|
For modding NHeat, even when "only" converting a car from another sim, it's important to
have at least an understanding of 3D modeling basics. Therefore it's strongly recommended to
download and carefully read (and understand) the
zmodeler manual.
Some 3D modeling basics
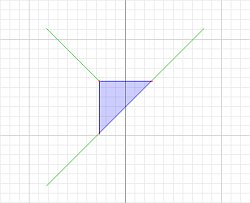
In modeling space, in a 3D program, each and any object is made up from a number of triangular
planes. These planes are called "faces". A face has a front side and no backside. If you're
looking at a face from it's backside, you'll simply look through it. You can make it's frontside
turning into it's backside, but you'll always only have one side of that plane that shows up.
If you need to have some plane that has both a showing front- and backside, you'll have to
make a copy of the base plane, flip the copy's frontside and add the copy to the original.
The 3 corners of each face are called vertices. It may sound weird at first, but each vertex
looks towards a certain direction. If light falls on a place nearby a vertex, the reflection
of that light (= intensity of what you see) depends on towards where that face's vertices are oriented.
If the vertex' orientation is opposite to the face's frontside, there'll only be very little or no
reflection of light. The face's frontside will show up very dull nearby that vertex
To show a vertex' orientation, there's an associated line called "normal" on each vertex,that indicates
where light would be reflected to from the adhering face's surface. So by rotating the normals, you
can for example make a face look being not a flat plane, but having rounded edges. By scaling
a face's vertices normal's length, you scale the intensity of reflection of light. If you scale down a
normal to a length 0, no light will be reflected at all at it's vertex' location
So the levels of a 3D model are
- Vertex and it's associated normal
- Face - made up from vertices that have been connected by lines. Face = poligon
- Object - made up from faces. Typically, an object is a mesh of faces
|

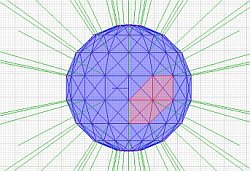
3D ball, made up from triangular planes |

The red dots are the vertices, the green lines are the normals |
|
To edit a 3D model, you'll always first have to chose on which of these levels you actually want to
do some editing. You cannot delete or add Faces in Object mode - you can only add or delete objects in
Object mode. But you can delete Objects in Face or Vertex mode, if you delete all the object's faces or
vertices, as then the object will simply stop to exist. You'll have to get used to that concept. If you are about
to do some editing to your 3D model, always first make sure that zmod is set to the right editing level
for what you intend to do
Vertices can be welded to another; faces can share vertices. Thus, moving a vertex means manipulating
each face that is connected to that vertex - and that vertex' normal ! This is important, as what you'll
see afterwards in NHeat is not just the object, but how it's surface reflects light. A smoothly
made surface will look distorted and/or even broken in places when the normals are not set in the
right way or faces don't share vertices in places where they should.
Normals
Zmodeler takes care of how to set the normals - in some way. In "automode", normals are automatically adjusted
to always length 1 (=100%) and right angle on top of the surrounding surface - at least each time you work
on that vertex. You can make zmod do this for all vertices all in one step by using autocalculate function (Surface... -> Normals... -> Calculate)
But sometimes it can be better to adjust vertices manually to get certain effects.
One example would be
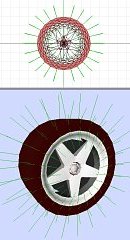
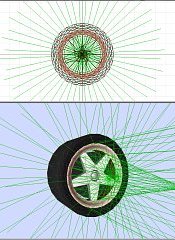
the length of the normals on a tire rubber's surface. Rubber will only reflect little light, thus
it may be a good idea to shorten the normals at those places to reasonable light reflections.
If the tire rubber surface and it's rim share vertices, this would either cause the rim's edge to get dull as well,
or the rubber's edge to be more shiny. A way to get around this effect is to make shure that rim and rubber
don't share any vertices.
|


|
Some major part of 3D modeling is not about building a model/object, but rather about making it look right. Adjusting
normals is part of doing this. The other part is taking care about which faces are connected to each other -
and which are not, as by not welding vertices/connecting faces you enable each face to reflect light
independedly from each other. Connected faces' light reflections are not independent, as those faces
share normals.

 |
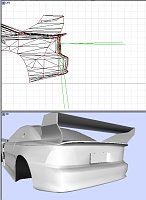
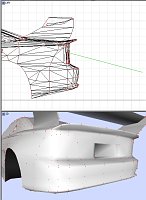
On this example you see the back of a car, with all faces being connected to each other (right), minimizing the total
amount of vertices. Each face shares it's vertices and normals with the ones it is connected to. The resulting
surface looks smooth.
On the left, you see the same car's back, but now the surface has been split up in places. The resulting surface looks more pointed
than before. And more real
The advantage of splitting up faces that way - if done right - is that zmodeler's autocalculate function
(Surface... -> Normals... -> Calculate) will set the normal's orientation right; you won't have to manually adjust any normal's orientation
|
3D models imported from some format that is not the program's own (in case of zmod Z3D-format), there'll
be some information lost on the import process - the normal's correct status can be one of those lost
informations. Zmod will make assumptions how to set the normals, but that doesn't need to be the correct
assumptions. So if you have imported your model and don't have it's Z3D sources, you should at least check
on it's normals if they look to be adjusted right on each place.
3D? 2D ?
Another aspect to take into consideration right from start should be about which way to work out details on the car model
You can either work out details in 2D, by using graphic effects on the car's textures to "fake" 3D structures,
or you can make this really be 3D details. Either way is ok and makes sense. "Faking" 3D by texturing works
best on high res textures (which increases GPU load), while increasing 3D detail increases poligon count and
CPU load.
Some general advice could be that the bigger the 3D detail, the more real 3D it should be
If you are converting cars from other games and have to rescale the car's textures, the 2D "fake 3D" effects
will suffer most by the textures' blurring.
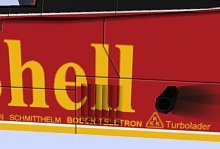
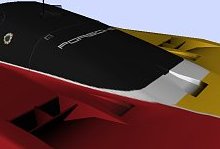
3D air intages on this car from GroupC mod, but 2D doorframes
| 
 |
Multiple Objects
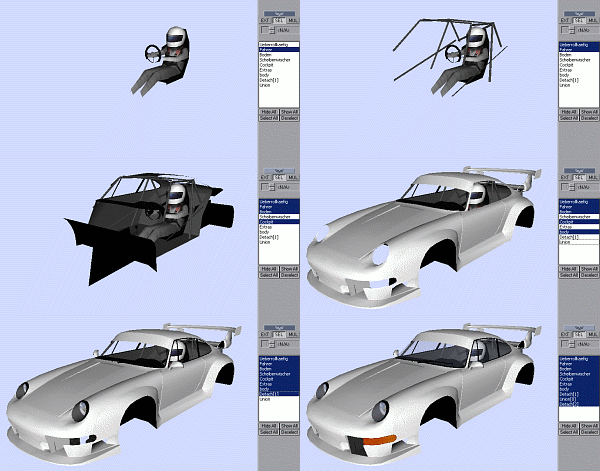
Another suggestion is to split up the car body to several objects and only merge them back to one
object when exporting to NHeat.
 |
This can easily be done on any object by first selecting all those faces
that you intend to detach from the main object. Then chose function Objects... -> Create... - > Detach in
zmodeler and use it on your object in face mode. It will split up your old object and create a new one.
The use of splitting up any object is to make parts of it easier available to editing and mapping.
Since light reflections may change on transistion areas of materials, which probably will (should) be
transistions of textures on the car model as well, splitting a car along (some of) it's intended mapping
areas for example would be no bad idea.
|
Using Objects... -> Create... - > Unite in Object mode will merge objects - but it won't weld it's vertices !
To weld vertices, you'll have to use Objects... -> Create... - > Unite in Vertex mode - and only within one object.
You cannot weld one object's vertices to another one's. You'd have to merge the objects before being able to
weld it's vertices.
 |
[ 3D Basics ] |
 |
|
|
