|
With NHeat, tires have to be singular objects in mod files of their own, unlike with some ISI
game engines. So don't put any tire objects to your car's MOD file. Instead, with NHeat each
tire set can be assigned to any car in a mod. Therefore all tire related files have to be put
to part.res.
There's 2 ways to assign a tire 3D model to a car in NHeat:
- Edit the attribute model in both front and rear table in physics.txt. Put in the name of
the tire model that you want to assign to the car, but without trailing numbers and "f". This is the default way;
it assigns a tire set to a certain car type. You can assign different tire sets to front and rear axle in physics.
- In drivers.txt add an entry tire_model [modelname] to the chosen driver's table.
This only assigns a tire set to a certain car paint - and it will be the same tire set for both
front and rear axle
If you load your
tire model to Zmodeler, the tire object should be named whatever[0] before exporting it
to NHeat's MOD format.
You don't have to care at all about the tire's diameter or width for now, as NHeat's game
engine will check the car physics file (physics.val) for those attributes - which means you will have
to set visible tire width and diameter by
editing physics.
Be aware that in NHeat the visible tire width and diameter does affect tire physics
Assuming an example tire set's name would be g40tire (Goodyear tire, 40 spokes rim), by default it
needs to have those files in part.res:
| g40tire.tab |
|
| g40tire0.mod |
= tire LOD0, used in F2 view |
| g40tire0f.mod |
= tire LOD0, moving |
| g40tire1.mod |
= tire LOD1, highest detail |
| g40tire1f.mod |
= tire LOD1, highest detail, moving |
| g40tire2.mod |
= tire LOD2, high detail |
| g40tire2f.mod |
= tire LOD2, high detail, moving |
| g40tire3.mod |
= tire LOD3, medium detail |
| g40tire3f.mod |
= tire LOD3, medium detail, moving |
| g40tire4.mod |
= tire LOD4, low detail |
| g40tire4f.mod |
= tire LOD4, low detail. moving |
| g40tire5.mod |
= tire LOD5, lowest detail |
| g40tire5f.mod |
= tire LOD5, lowest detail. moving |
|

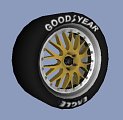
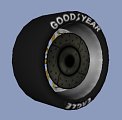
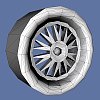
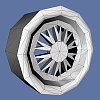
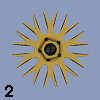
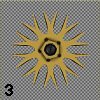
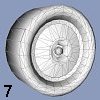
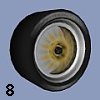
tire1.mod, mapped |

tire0.mod, mapped |
|

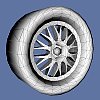
tire1.mod
750 poligons |

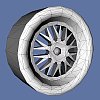
tire2.mod
622 poligons |

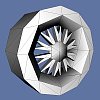
tire3.mod
500 poligons |

tire4.mod
300 poligons |

tire5.mod
224 poligons |
So actually it's 12 tire model files, 6 LODs for standing tire and 6 for moving tire. Check
LOD modeling tutorial for why there's 6 LODs
each and if they are even all actually used on each mod/car. Tire LOD0 is somewhat different
as it's used for looking at it not from outside the car, but inside. So there's no need for
that LOD0 to have any outside at all. It's generally a good idea to use tire LOD1 to
derive LOD0 from it by just deleting the outside faces. Saves poligons and some work ....:-)
Modeling tire movement
If there's some nicely made rims for your mod, you'd want them to show up. Unfortunatly cars
will usually move and though your rims will look great even then, any screenshot of a moving car
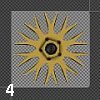
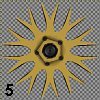
will look like it doesn't move at all - because of the rims. To get that "moving" effect = blurred
rims, NHeat uses a set of LODs that are intended to have a tire model which already looks like moving.
Those LODS have a trailing "f" in the mod file's name
 |
 |
It's important to put some thought into the mapping of tires, especially if there'll be more than just
one set of tires. Textures used on mapping tires can be numerous, but NHeat has a
build-in limit for the total number of texture files that can be used all at once.
The less TEX files on a mod, the better Generally it would be
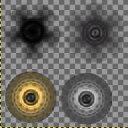
a good idea to put all tire related textures to one or two TGAs, one of these being
"alpha channeled" = transparent.
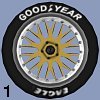
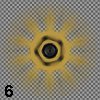
On the right you see 2 parts from GroupC mod's "collector" TEX files
The TEX files that are made from these TGAs should go into part.res as well
|
The just made TGA can now be used for mapping a disk that replaces the 3D spokes from the standing tire's
model. You have to map that TGA by taking care that the scaling is the same as with the standing
tire's 3D spokes.
Some nice sideeffect of that method is that even though you're using quite a lot of poligons on the standing
tire, most of the time it will be the moving (f) tire model being used. And that one has much less poligons
because of using a texture mapped disk instead of 3D spokes.
Light Reflections
Since rubber usually doesn't reflect light very much, the normals of those vertices' which are part of faces
that make up the tire surface/rubber should be scaled to about < 20%. Additionally you should take care that
environmental mapping is switched off for the tire rubber mappings
(ZModeler -> Edit -> Attributes -> Misc -> check Dont't blend textures)
 |
[ Tires ] |
 |
|
|
